Tips on Silicone Breast Form Attachment
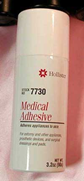
Good quality breast forms and enhancers have a strong polyurethane outer coating that allows for attachment to the body with approved medical tape or adhesives. We recommend using tapes which have been FDA approved for use on skin, and if you’re using adhesive, then Hollister 7730 spray adhesive is the safest product on the market today, both for you and your forms.
Step 1: Preparation
To maximize the adhesion, always wash the area of skin in question first – we strongly recommend that the skin area is also clean-shaven. After washing, rub alcohol or witch-hazel over the clean area to remove any soap residue. Soap tends to remain on the skin when washing and will act as a barrier between the skin and the adhesive, thus leading to an unsuccessful attachment.
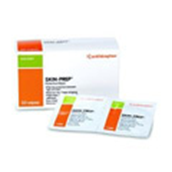
Another method you could try would be to use Skin-Prep. This is a one-stop-shop product. No need to wash the area and go over it with alcohol: these pads allow you to apply your adhesives immediately after cleaning. The formula on the Skin-Prep wipes creates a film that increases the adhesion of tapes or sprays. They are fast and easy to use and also help reduce discomfort when removing adhesive from skin surface.
Step 2 – Attachment
Firstly, put on a bra that has a nice secure fit. Next, place the forms, one at a time, on your chest.
When you find the desired spot, take an eye pencil and outline where you would like to position your breast forms or enhancers, for later application. Spray a light layer of Hollister 7730 adhesive onto the back of one breast form and allow it to set for 5 – 10 seconds.
Tip: Some people prefer leaving a gap at the bottom end of the form which will allow the silicone breast to move more easily with the body.
Place the form in the pre-marked area and rotate it lightly so that the adhesive transfers onto the skin. Remove the spray from the form again and leave it to rest whilst repeating the process with the other form/side of the chest.
Now, place the form firmly onto the previously marked area on the chest that now has a residue of adhesive on it. Then, pull up the bra cup to hold the form snugly against the chest wall.
Repeat this process with the second silicone breast form and leave it in place supported by the bra for 10 – 20 minutes. Gently remove the bra and you should be free to move around if you have followed all the steps correctly.
Tip: Larger forms should always be partially supported with the use of a bra.
If you’re using tapes, then follow the same steps.
Removing the Breast Form and Enhancers
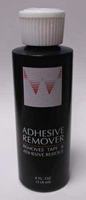
In order to detach the breast forms, carefully pull them away from the skin, taking care not to damage the silicone. After they are removed, the adhesive residue should be removed immediately. Use a recommended adhesive remover like ADR Breast Form Adhesive Remover. This product gently removes tape and adhesive residue from both skin and breast forms.

To remove the adhesive from your silicone breast forms or enhancers, use cotton wool to apply the solvent to the adhesive area, then wipe it clean. A quick, no fuss method to remove adhesive from forms is to pour some remover onto a large flat dinner plate, place the form with the adhesive side down, wrap cling-film/plastic-wrap over the form and plate and leave it for an hour or two. The adhesive will dissolve by itself.
Once the adhesive has been removed from the forms, they should be washed in warm, soapy water. Regular cleaning, care and maintenance of silicone breast forms and enhancers will inevitably extend their life.
Caution: Once the polyurethane film on your breast forms/enhancers has been pierced, the liquid will leak out. The only measure to stop this is by using Scotch Tape, though this will only temporarily stop the disintegration of the form. Keep sharp objects away from silicone breast forms at all times and, when not in use, store them in the boxes they came in.